

Deploying (CDK) to AWS using Bitbucket Pipelines and OIDC


The other day I was browsing Reddit and a user asked for help regarding deploying CDK with Bitbucket Pipelines, using OIDC. I assumed that this was straight forward and helped the user by pointing him to some articles. A few days later, the same use case appeared on one of our backlogs, so I took the opportunity to test if it actually was straight forward. As things go; it was, after a few hours of debugging.
In this article I'll try to explain what I've done to get this working, but also try to help you understand what we're actually doing.
I'm in no way an authority on CDK, Bitbucket Pipelines or OIDC, but I know enough to stick them all together to work in a nice way!
The What and Why
If you're reading this, chances are that you're already using both Bitbucket pipelines and CDK, perhaps you're even already deploying CDK using Bitbucket pipelines. Then you also know that traditionally we've always used IAM access keys to authenticate to AWS from Bitbucket pipelines. There are several ways to secure those access keys when stored in Bitbucket, but that just solves one part of the problem. Access keys have some inherent flaws, as they can be used by anyone, from anywhere. Leaking access keys is the number one way to compromise an AWS account. If you can help it; don't use access keys.
A better way, which more and more platforms support, is telling AWS that you trust the OIDC provider that comes with your Bitbucket workspace, and allow it to assume IAM roles on your AWS account.
There actually is a pretty good article on atlassian.com that outlines most of the process, but it skips some important steps to get CDK to work.
The Warning
Even though I'm convinced using the solution below is far superior to using IAM access keys, there are some things to take into account. First; anyone with enough permissions in your Bitbucket workspace can use the roles that Bitbucket can. This is also true for access keys, but it's good to be aware of. Secondly, this article does not go in to limiting which repo and branch can actually use an IAM role. Since the whole workspace is trusted, it's good practice to limit to a repo and branch. How to do this is shared in this article on atlassian.com.
Prerequisites
Since we're going to deploy CDK, we're assuming you have already bootstrapped the AWS account and region where you want to deploy your app. We're also going to assume that you can access the AWS account, as well as create IAM Identity Providers and roles. Administrative privileges in your Bitbucket workspace would also be nice.
Getting started with OIDC
First, we will need to configure AWS to trust the OIDC provider that comes with your Bitbucket workspace. To do that, we require the Identity Provider URL and the Audience. Both can be accessed by browsing to Repository settings -> OpenID Connect or at https://bitbucket.org/YOURWORKSPACE/YOURREPO/admin/addon/admin/pipelines/openid-connect.
The Identity provider URL will look something like this:
https://api.bitbucket.org/2.0/workspaces/YOURWORKSPACE/pipelines-config/identity/oidc
And the Audience will look something like:
ari:cloud:bitbucket::workspace/31337e8d-8624-1337-9a0d-31337d6664a
IAM Identity Provider and IAM Role
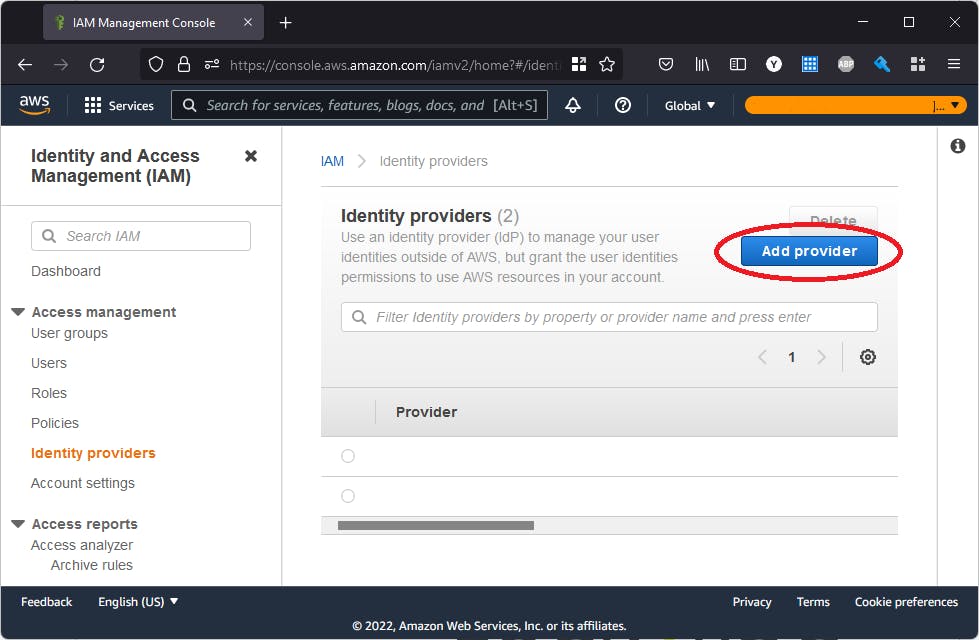
Next, log in to your AWS account and browse to the identity providers screen in the IAM service.
Once there, click Add Provider
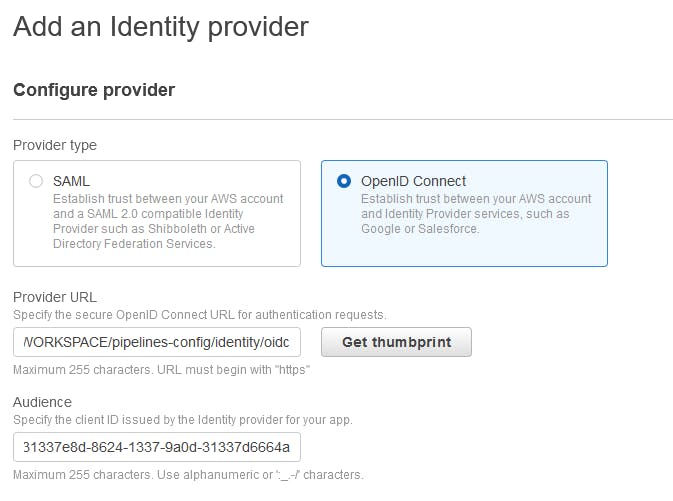
Then, select OpenID Connect and enter the Provider URL and Audience from the previous step. Click Get thumbprint and then Add Provider.
If successful, you'll see that you now have an additional identity provider registered. Next, browse to Roles and select Create Role.
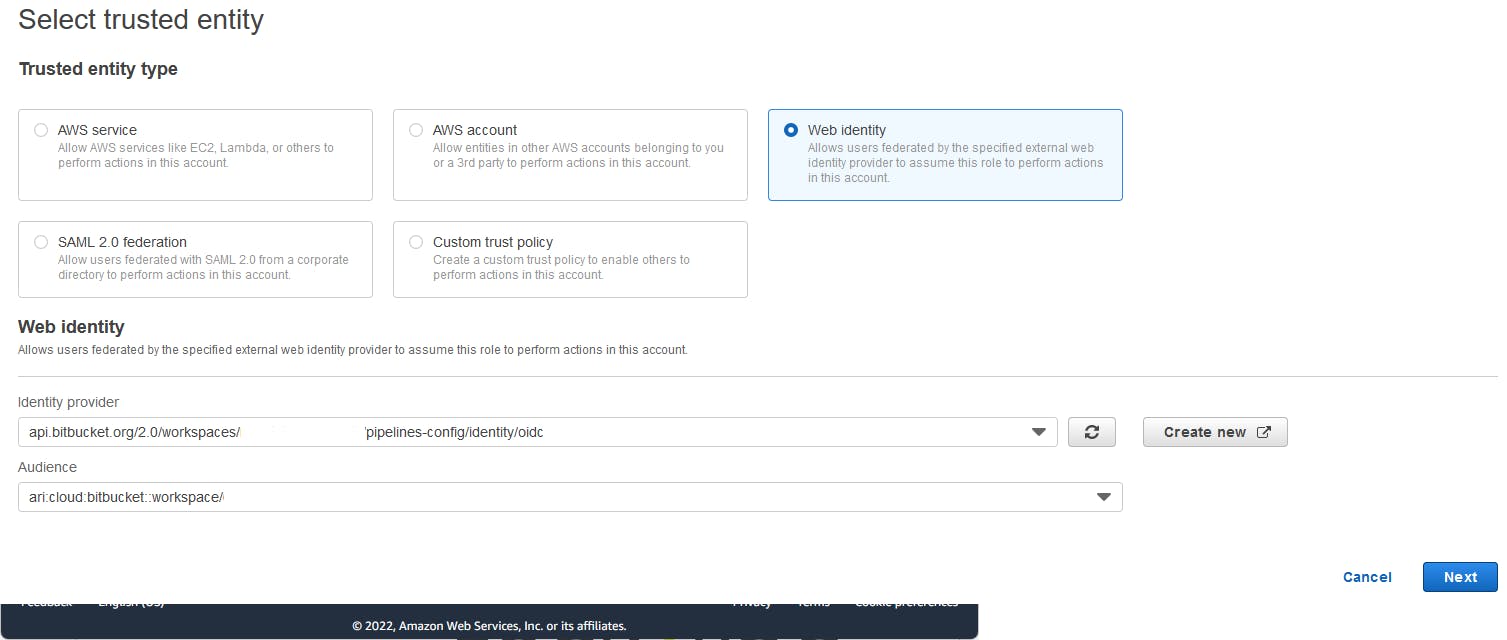
Then select Web Identity and select the Identity provider and audience from the drop down, and click next.
In the next screen, select one ore more Permissions policies. It's good practice to pick and choose what your pipeline will need, in stead of going for AdministratorAccess right off the bat.
After choosing the applicable policies, give your role a name and select Create role to finish the process. Once the role is created, find and open the role and note the ARN, because we'll need it in the next step.
Bitbucket Pipelines
Using Bitbucket Pipelines is fairly simple. You create a file named bitbucket-pipelines.yml in the root of your repo and specify which actions to take when. Most actions are the same as on your local machine; just simple commands.
The syntax that Bitbucket Pipelines uses is well documented and can be quite complex. Today we'll do some simple stuff, so it's more like a getting started.
So; create a file named bitbucket-pipelines.yml in the root of your repository and copy over my example from Github. I'll go through what does what next.
Image
The pipeline runs in a docker image and so we must choose one that fits our needs with little to no install or updates of packages. I chose the node:16.3.0 image since it has everything I need to deploy CDK apps.
image: node:16.3.0
Pipeline
In the next few lines, we start the actual definition of the pipeline, and here I've chosen to run this pipeline for the main branch only.
pipelines:
  branches:
    main:
Steps
Once we've defined that we want to run a pipeline for our main branch, next we need to define which steps the pipeline has. For CDK I've chosen a "Synth" and a "Deploy" step.
First, we define our Synth step and tell Bitbucket to use OIDC:
     - step:
          name: CDK Synth
          oidc: true
Then, we configure a cache for node packages, this will speed up the steps in the future:
          caches:
            - node
Next, we define the script that must run. Change the AWS_REGION and AWS_ROLE_ARN to your Region and to the ARN from the role that we made earlier. The other commands in this script are static.
Warning; the AWS_REGION export is required! Even though CDK might say that it will use it's own ENV files to define a region, the variable is used to assume the IAM role. Removing it will break the process.
          script:
            - export AWS_REGION=eu-west-1
            - export AWS_ROLE_ARN=arn:aws:iam::012345678901:role/IAMRoleForBitBucket
            - export AWS_WEB_IDENTITY_TOKEN_FILE=$(pwd)/web-identity-token
            - echo $BITBUCKET_STEP_OIDC_TOKEN > $(pwd)/web-identity-token
            - npm install
            - npx cdk synth
As a last step, we define which artifacts we want to share with the next steps, in our case it's the output of CDK synth:
          artifacts:
            - cdk.out/**
And that's our first step! The next step, CDK Deploy, is identical to the Synth step, but we use the npx cdk deploy command to start the actual deployment.
We leave out the artifacts part since this is the last step and we don't any files to transition. In stead, depending on your deployment, we can add docker support. In my case I was deploying a task to ECS, and CDK needs docker to be able to build the image:
          services:
            - docker
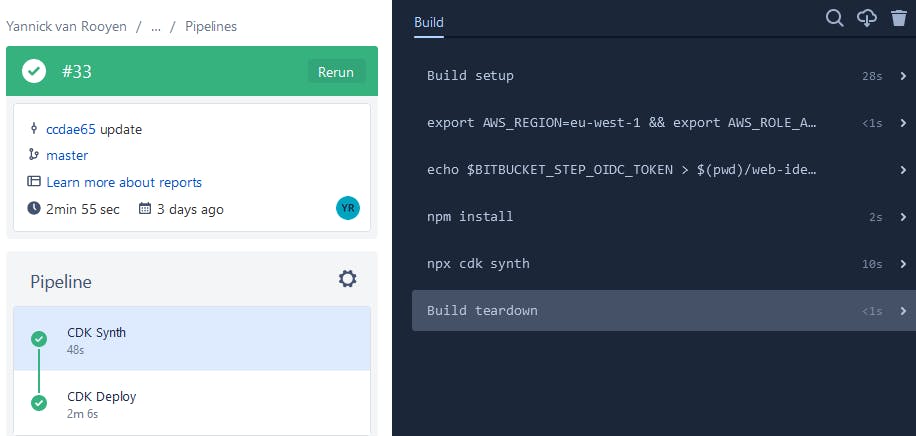
Testing, 1-2-3.
And that's it! Commit bitbucket-pipelines.yml to the branch that you've defined and watch your pipeline deploy your app! (or fail miserably)
Closing thoughts
As mentioned earlier, this example is meant to get you a working example and by no means covers all use cases. Also, for the title, I've chosen to put CDK in parentheses since this solution should work for Terraform, Pulumi, CloudFormation or any other IaC tool. Note that some might require you to use the AWS CLI to script the "assume role with web identity" part, since some tools don't support it yet.
Thank you for reading this article!